Creating APT File
Generating “APT” Output in FUSION
Important Note: Normally, MANUSpost can be run automatically within Fusion. The necessary settings for this are shown in the relevant video. If MANUSpost is run automatically within Fusion, there is no need to perform the operations described in this document, because the NC program output is automatically generated.
The following explanations are given for informational purposes only, and if “MANUSpost - Fusion integration” is not desired, the following steps can be performed manually to create an “APT” file within Fusion, and then the “APT” file can be transferred to MANUSpost to carry out the NC program creation process (post processing).
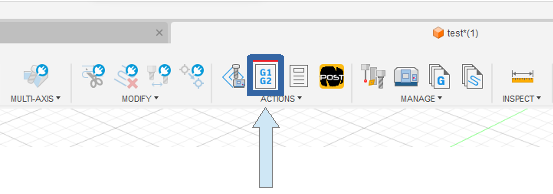
First of all, within the “Actions” section in Fusion, the general post processor screen should be opened by clicking on the “Post Process” icon.
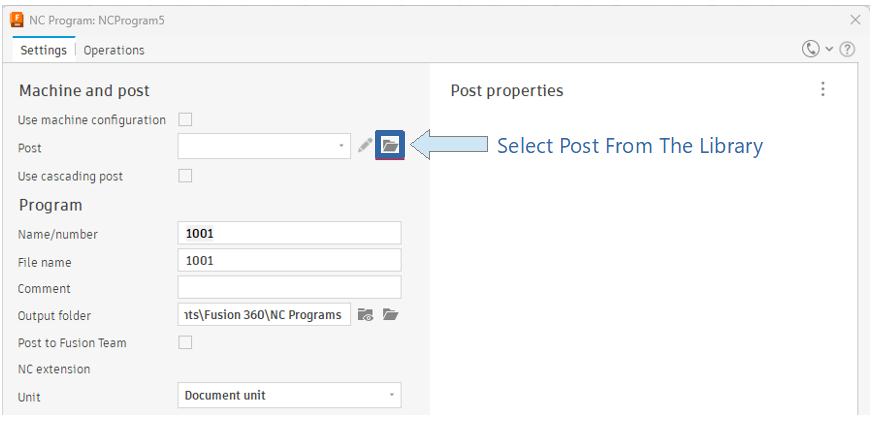
Later, in the window that appears on the screen, under the “Settings” tab, press the “Select Post From The Library” button to open the list of ready-to-use post processors.
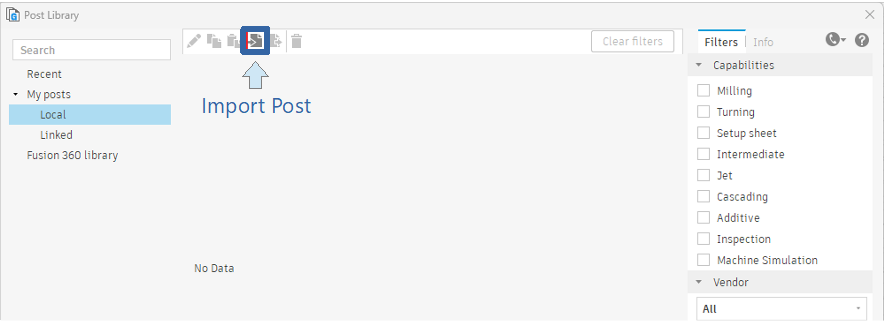
Then, click on the “Import Post” button on the page that appears on the screen.
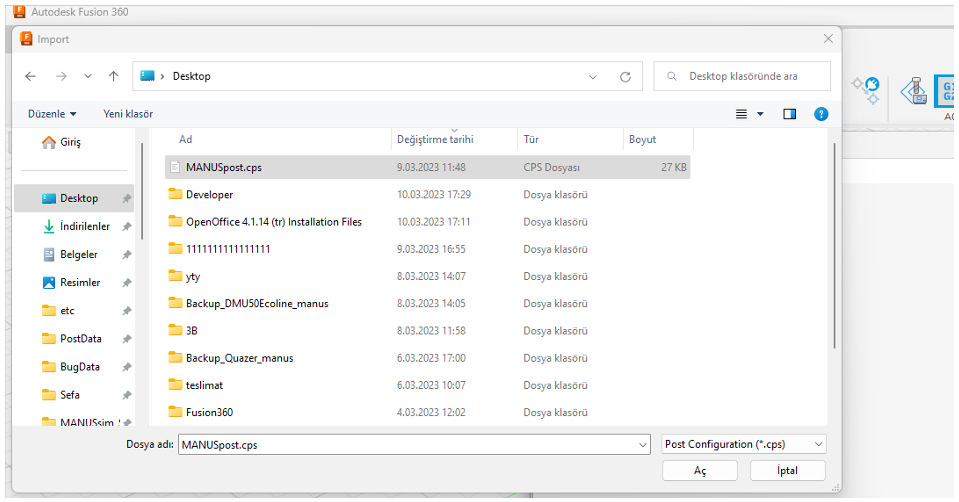
Afterwards, as shown below, select the “MANUSpost.cps” file that you have already downloaded from the MANUSpost developer program’s own website.
5. After this process, the “MANUSpost.cps” file is automatically added to the “My posts” > “Local” directory as shown below.
Select the “MANUSpost.cps” file that was added to the “Local” directory, and then click on the “Select” button in the lower right corner.
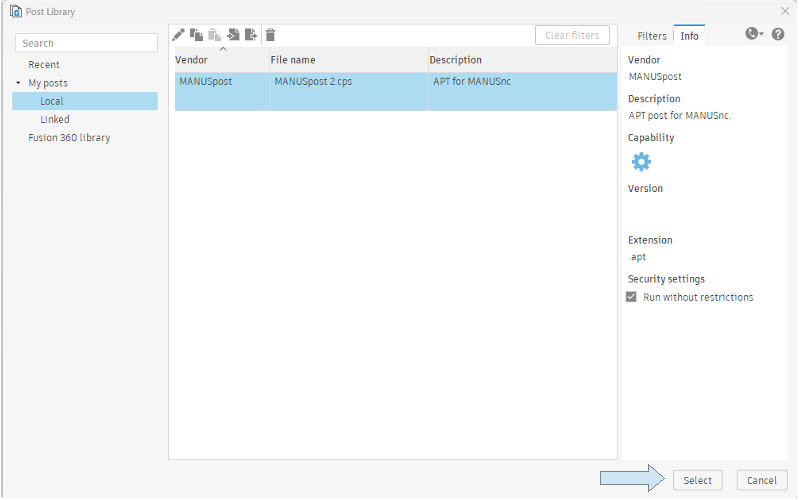
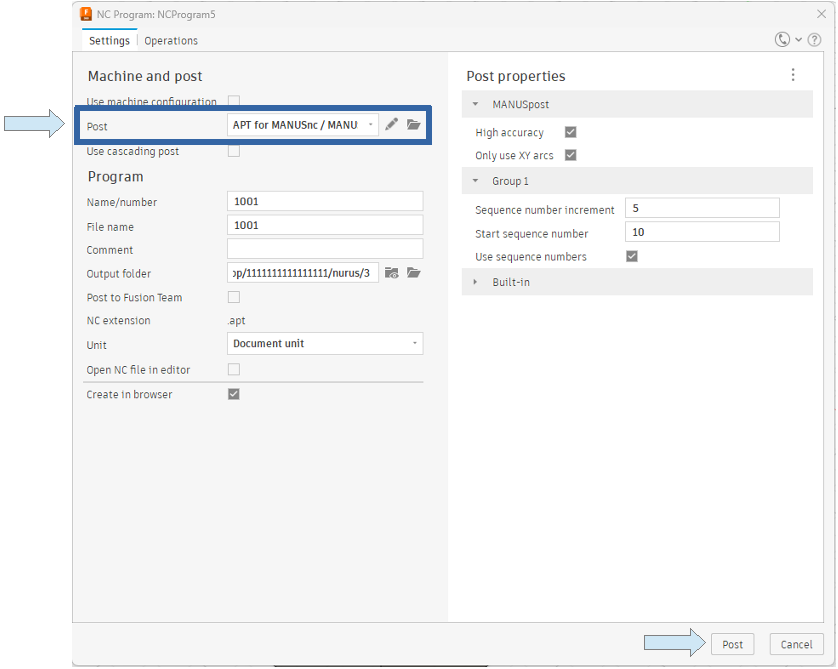
7. After this selection, the “MANUSpost.cps” file will appear in the “Post” section as shown below.
Click on the “Post” button in the lower right corner to get the “APT” output.
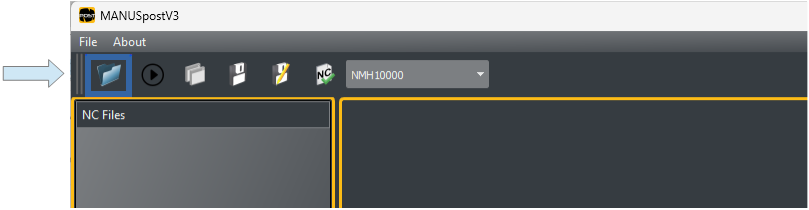
The “APT” file created can be opened in the MANUSpost interface by clicking on the “Open” icon as shown below.
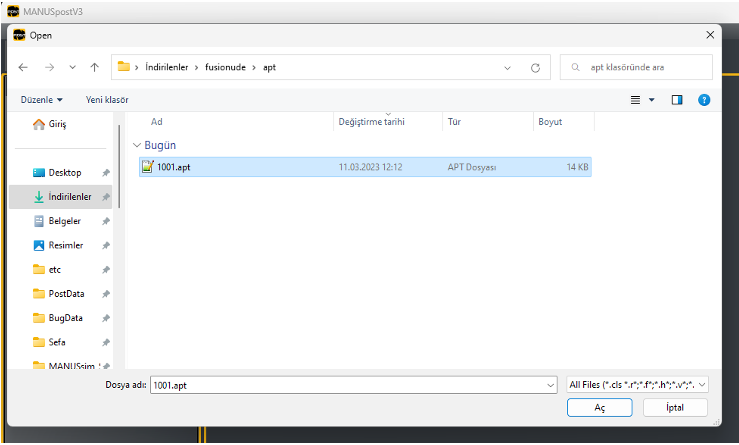
10. And the selected “APT” file will be opened in the MANUSpost interface as shown below.
In the final step, the “Post Process” button is pressed as shown below, and the NC program is created. The created NC program is displayed to the user on the screen next to the “APT” file. This NC program can be saved to the computer by clicking on the “Save” button in the menu above.
